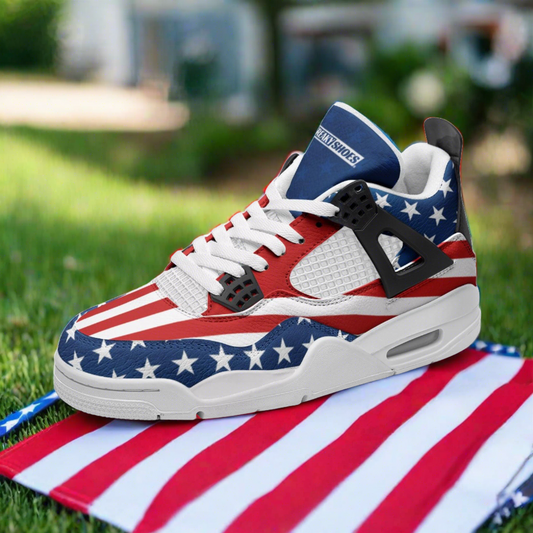
Customize And Design Your Shoes With Sharpie Markers

Customize And Design Your Shoes With Sharpie Markers

Do you want to customize and design your shoes with Sharpie markers? It's really fun! According to Expert Market Research, the global “custom” shoes market is growing rapidly. It was valued at USD 765.4 million in 2023 and is expected to reach USD 1,468 million by 2032.

We’ve been doing shoe customization for years and are now sharing our step by step process with you. If you're a little bit creative, you will be able to do the whole thing with sharpie markers effortlessly.

To customize shoes with Sharpie markers, start by cleaning the shoes and removing laces. Then, sketch your design lightly with a pencil and color with Sharpies. After this, re-lace and enjoy!

Looks easy, right? 

But wait. Just for you, we’re also sharing some simple tips to make customization and designing enjoyable. So, stick to the end.

Key Takeaways

  • Customizing shoes with Sharpie markers is easy, as you will only need a few basic materials.
  • Always choose light-colored shoes for the best results.
  • Plan your design first and then sketch it lightly with a pencil before using Sharpie markers.
  • Start with lighter colors and gradually add darker ones.
  • Use rubbing alcohol to fix mistakes and ensure your design is clean.

Now, the details.

How to Customize And Design Your Shoes With Sharpie Markers? (9 Steps)

To customize and design your shoes with sharpie markers, we suggest you gather the necessary materials first. After this, prepare your shoes and do the design. That’s it.

Here’s the step-by-step process:

Step One: Collect All the Needed Materials 

Before starting, you should gather all the materials you'll need. Keep in mind that having everything ready will make the process smoother.

Of course, you will need Sharpie markers. According to Sharpie, the brand keeps making its products better to make people happy. They are creating new types of ink and adding lots of new colors. For example, they made the Sharpie S-Gel pen, which doesn’t smudge or bleed.

Here’s the table on all the essential materials you will need to customize your shoes:

Material

Purpose

Sharpie markers in various colors

For creating your designs

Pencil (optional)

For sketching designs

Ruler or stencil (optional)

For precise shapes

Rubbing alcohol

For corrections

Cotton swabs or Q-tips

For applying rubbing alcohol

Sealer spray (optional)

To protect your design

Having these items on hand means you're ready for the next steps.

Step Two: Choose Your Shoes

Let us tell you this - Selecting the right pair of shoes is crucial for a successful design. In our opinion, light-colored shoes, especially white, are ideal. Why? 

Well, they allow the Sharpie colors to stand out more vibrantly. 

We also recommend using canvas or leather shoes. In our experience, both materials work well with Sharpie markers.

If you’re still confused, then think about the design you want to create. If you have a specific theme in mind, select shoes according to it. For example, if you're aiming for a beach theme, a pair of white canvas sneakers would be perfect.

Step Three: Prepare Your Shoes

You will also need to make sure your shoes are ready. It’s easy. First, give your shoes a good cleaning. We suggest using a damp cloth, but if it is not available, you can use a soft brush. Remember that the sharpie ink will only stick if your shoes are clean.

Don't forget to take out the laces as well. This will make it easier to draw on your shoes. Most people soak the laces, so that they look clean.

Next, you will have to secure the shoes for designing. We recommend Masking tape here. If you want neat edges, then cover them with tape. Similarly, if you want to keep certain areas free from ink, use masking tape there as well. 

Getting our shoes ready might take a little time, but it’s worth it. Clean and properly taped shoes make the designing smoother.

Step Four: Plan Your Design

Now, let's talk about planning a design. 

According to Knowledge at Wharton, over the years, Sharpie markers have become more than just tools for writing. They are now seen as a fun way to be creative and express yourself. The brand has used this idea to start campaigns like "The World Is Your Canvas," which encourages people to share their drawings.

But before you start drawing, it's a good idea to plan what you want your shoes to look like. You can lightly sketch your design with a pencil. This will help you see what your design will look like. The reason we suggest this is that you would be able to easily fix any mistakes before you use the Sharpies. 

Moreover, if you want perfect shapes, you can use a ruler or stencils.

Here, we also suggest people to try out lots of designs and then pick the best one. Here are four fun design ideas to get you started:

  • Geometric Patterns: Draw shapes like triangles, squares, and circles. It makes a cool, modern look.
  • Floral Designs: Sketch flowers, leaves, and vines for a beautiful nature theme.
  • Cartoon Characters: Add your favorite cartoon characters for a fun and playful design.
  • Inspirational Quotes: Write your favorite quotes or phrases in cool styles.

In our experience, planning makes the actual drawing part easier. We get a clear idea of what we’re doing. So take your time and think about your design.

Step Five: Start Drawing

Now comes the exciting part - it's time to start drawing your design with the Sharpie markers! We suggest beginning with the lighter colors first. Why? In our opinion, this helps because it's easier to cover lighter colors with darker ones (if needed). 

Light colors are also great for outlining your design. That’s why most artists use them first to create a basic sketch.

When you start drawing, be patient. Take your time and work slowly to avoid making mistakes. If you do make a mistake, don’t worry! We can fix it. Simply take a cotton swab, dip it in rubbing alcohol, and gently rub it over the mistake. 

This little trick makes the process less stressful.

If you’re a newbie, we recommend working in small sections. We’ve found that this helps people focus on details. Furthermore, you will also be able to ensure you don’t smudge any areas you’ve already colored. 

As you draw, remember to take breaks if you need to. Stay fresh and don’t be afraid to mix and match colors. We’ve found that the most unexpected color combinations turn out to be the best ones! If you’re unsure about a color choice, test it on a piece of paper first to see how it looks.

Step Six: Add Details and Layers

Once you have the base design on your shoes, don’t get relaxed. This sixth step is the most critical one. In this, you will add extra touches. It can be tricky for you if you have not decided which details or layers to add.

Here are five suggestions:

  1. Add Shadows and Highlights: In our opinion, adding shadows and highlights can give your design depth and dimension. You should use a slightly darker shade of your base color for shadows and a lighter shade for highlights. 
  2. Use Patterns and Textures: Patterns and textures can make your design interesting. You can use dots, stripes, or even tiny doodles.
  3. Include Fine Details: Small details can make a big difference. If you're drawing flowers, add veins to the leaves or tiny petals.
  4. Blend Colors: You can use two or more colors and blend them where they meet. This technique works well for creating gradients.
  5. Add Borders or Outlines: Adding borders or outlines can help define your design and make it stand out. Use a black Sharpie for this.

When you’re adding details and layers, work slowly and carefully. It's easy to get carried away, but we highly suggest taking your time.

Step Seven: Let It Dry

After you’ve completed your design, it’s crucial to let it dry completely. This ensures that the ink sets properly and doesn’t smudge.

Place your shoes in a well-ventilated area. Avoid putting them in direct sunlight (sunrays) as this can cause the colors to fade. Just let them sit and air dry for a few hours. Make sure your shoes are placed on a flat surface. 

Here, we want you to tell you that never use a hairdryer. Artificial heat can cause the fabric to shrink. 

However, if you’re in a hurry, you can use a fan to help with drying. Place the fan at a distance and let it blow gently over the shoes.

Step Eight: Seal Your Design

To make sure your design stays vibrant, it’s a good idea to seal it with a spray. This step will protect all your hard work and make your shoes more durable. Here’s how to do it:

  • Choose the Right Sealer: There are many types of sealer sprays available. Make sure to choose one that is suitable for fabric or leather (depending on your shoes). We suggest reading the label carefully to ensure it’s the right product.
  • Prepare the Area: Work in a well-ventilated space, preferably outdoors. We recommend a garage with the doors open.
  • Follow Instructions: Shake the sealer spray well before use. After this, hold the can about 6-12 inches away from the shoes and spray. Don’t hold the can too close as this can cause the sealer to pool and drip.
  • Even Coating: Make sure to cover the entire surface of the shoes. It’s better to apply several light coats rather than one heavy coat. This ensures an even coverage and prevents dripping.
  • Let It Dry Completely: Just like with the ink, the sealer needs time to dry. Follow the drying time recommended on the can. 

We’ve found that sealing your design protects it from water, dirt, and everyday wear and tear. So, follow this step as well.

Step Nine: Reassemble the Shoes

Once everything is dry and sealed, it’s time to put your shoes back together. This final step is easy but important.

Take the shoelaces you removed earlier and re-lace them into your shoes. If your laces are unclean, we suggest cleaning them. You should consider getting new ones if they are super dirty.

In this step, you should also make sure the laces are even and that the shoes fit comfortably. 

Look over your shoes one last time to ensure everything looks perfect. Check for any spots you might have missed with the sealer.

That’s all. 

Now that your shoes are complete, it’s time to show them off! Wear them with pride and let everyone see your creative skills.

Tips for Smooth Designing of Your Shoes With Sharpie Markers 

Designing your shoes with Sharpie markers can be super fun, but it helps to have a few tips to make the process enjoyable. Here are some friendly and simple suggestions to help you create the best designs possible.

Tip #01: Test Colors

Before you start drawing on your shoes, it’s a good idea to test the Sharpie colors on a piece of paper. This way, you can see exactly how the colors will look. Sometimes, the color might look a bit different on paper than it does in the marker cap. 

Moreover, testing also helps you see whether you like the shades together.

Tip #02: Get Creative

The best part about customizing your shoes is that you can get creative. Don’t be afraid to try different designs and techniques. The possibilities are endless - Create abstract patterns, intricate doodles, or even write your favorite quotes. 

Remember, there are no rules when it comes to art. So, have fun and experiment with different ideas. 

Tip #03: Heat Set the Ink

Once the ink is completely dry, there's an extra step you can take to make sure your design lasts longer. You can heat the ink using an iron. 

Here’s how to do it safely:

  1. Use a Low Setting: Set your iron to a low setting. High heat can damage your shoes or cause the colors to bleed, so be gentle.
  2. Use a Cloth Barrier: Place a clean cloth over your design before you iron. This protects the ink and the material of your shoes.
  3. Iron Carefully: Gently press the iron over the cloth. Don’t leave the iron in one spot for too long. Just a few minutes should be enough to set the ink.

Tip #04: Involve Friends and Family

Customizing shoes can be even more fun when you involve friends and family. They can offer new and creative ideas for your designs. They might think of things you haven’t considered.

According to KickFlip, a lot of people, especially those aged 16-24, are very interested in customizing their shoes. About 48% of people in this age group want to create unique footwear designs.

We’ve also found that working together can make the process faster and more enjoyable. Everyone can take turns drawing or suggesting colors and patterns.

Plus, making art together creates fun memories. It’s a great way to bond and share your creativity.

So, invite your loved ones to join in.

Tip #05: Combine with Other Art Supplies

Sharpie markers are awesome, but you don’t have to stop there. You can combine them with other art supplies to make your designs even more special. 

Here are some ideas:

  • Fabric Paints: Use fabric paints to add more color and texture to your design. They come in many colors and can be applied with brushes or sponges.
  • Glitter: Add some sparkle with glitter. You can use fabric glue to apply glitter to specific areas of your design.
  • Rhinestones: Glue rhinestones onto your shoes for a bit of bling. They can make your design pop.
  • Stickers and Decals: Use fabric stickers or iron-on decals to enhance your design. They’re easy to apply and come in many shapes and patterns.
  • Stencils: Stencils can help you create precise shapes and patterns. Use them with fabric paint or Sharpie markers for professional-looking designs.

Tip #06: Document Your Process

One of the best ways to do shoe designing is documenting the process. Here’s why it’s a great idea and how to do it:

  • Track Your Progress: Taking photos or videos of each step lets you see how your design evolves. It’s satisfying to look back and see how far you’ve come.
  • Share Your Creativity: Sharing your process on social media or with family can inspire others to try it too. You can create a tutorial or just show off your awesome work.
  • Create Memories: Documenting your process turns your project into a story. These photos and videos will be fun to look back on.

To document your process, you can use your phone. Just snap pictures or record short videos as you go. You can even make a time-lapse video by setting your phone on a stand and recording the whole process.

Practice

If you’re new to using Sharpie markers for designing, it’s a good idea to practice first. In our opinion, practicing on an old pair of shoes or a piece of fabric will help you get used to how the markers work. You’ll learn how to handle them, how the colors look, and how they blend.

Moreover, practice helps you figure out what techniques work best. So, you will be able to avoid common mistakes. This way, you’ll be more confident when you start on your actual shoes.

Plus, as you practice, you’ll become more skilled and confident. By the time you start on your final design, you’ll know exactly what to do.

So, grab an old pair of shoes and start practicing.

That’s all about how to customize and design your shoes with sharpie markers.

And if you become a pro, we've written an Ultimate Guide for Shoe Designers to Start Selling Their Own Designs to make some bucks.

Back to blog

Leave a comment

Please note, comments need to be approved before they are published.

Pete Oliveri

CEO / AUTHOR of Freaky Shoes®

Meet Pete Oliveri, the creative force and driving visionary behind Freaky Shoes. A New Jersey native, Pete is an accomplished American artist dedicated over 20 years to the consumer products industry, leaving an indelible mark in various domains such as graphic and packaging design, illustration, and product development. His extraordinary talent has earned him accolades, including the prestigious Bio Comics Award for his exceptional comic book content development work. However, Pete's ultimate achievement lies in his role as the Founder, CEO and creative genius of Freaky Shoes.

1 of 3